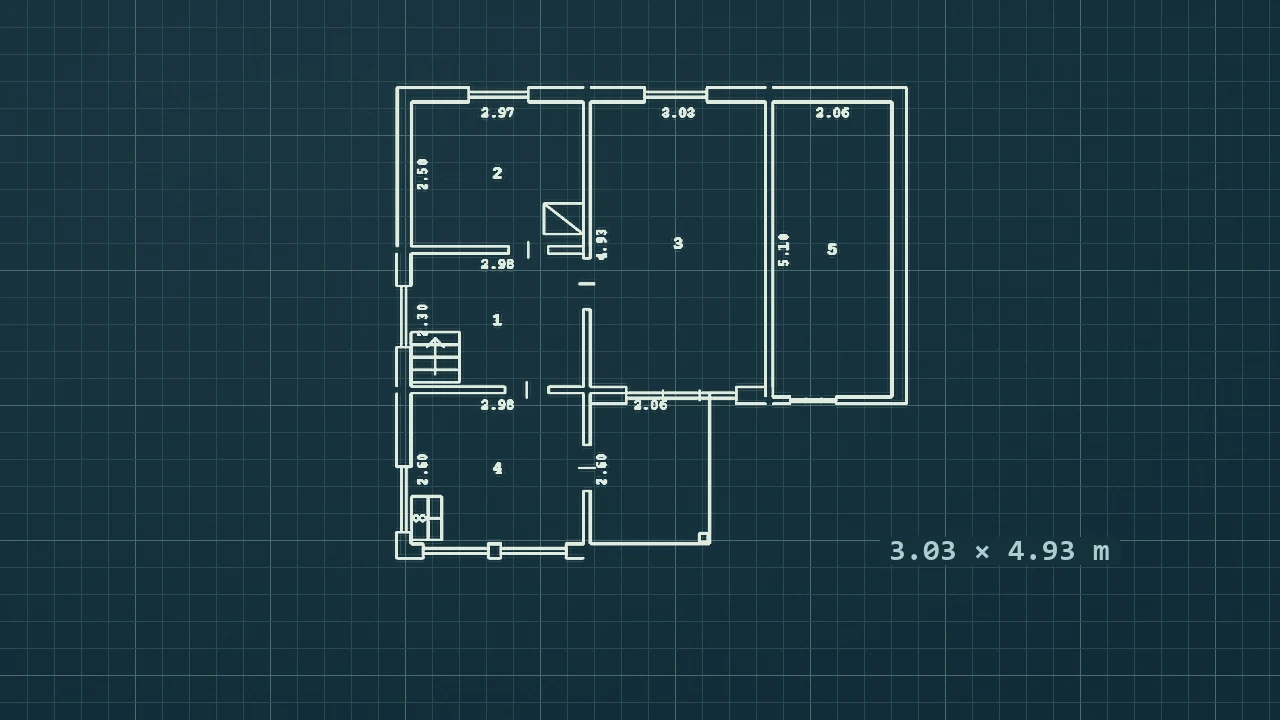
Check what the figure measures
Start with the outside dimension chain, then work room by room. Follow each leader to both endpoints and check the reference face. Enter a wall-to-wall distance on the correct side and an opening size on the opening. A clearly read number can still produce an incorrect plan when it is attached to the wrong edge.
Rotate the view or revisit the source photograph when a number was written upright along a vertical wall. Compare the detected reading with the number next to it and look for overlapping strokes after corrections. The recognition documentation identifies heavy skew and uneven lighting as sources of error.
Catch transpositions with a control span
Use the window wall of the studio example. Its independent overall dimension is 420 cm. With two 135 cm returns, a hypothetical reading of 156 cm for the opening gives a 426 cm total. Check the original and the field notes before choosing 150 cm, the value that closes this particular example.
An arithmetic check tells you which group is inconsistent. The whole chain can disagree because of units, a wrong endpoint, or more than one erroneous reading. For two rooms separated by a partition, include its measured thickness when the total crosses both internal wall faces.
- Select the edge or opening and locate that same segment on the source sketch.
- Compare the proposed reading to the source and enter the confirmed value in centimetres.
- Regenerate the drawing and check the overall span and opening position. Resolve errors before export.
Handle a faint or overwritten number
If you use the Vision control, frame the individual number in the source image and check the proposed value against the sketch. Its output is an extra reading for review. A measurement written over an earlier value may need confirmation from the field log or a new measurement.
In the two-storey example, the central room carries opposite readings of 305 and 301 cm. These two readings belong to different sides. Review both source values before comparing them with the 3.03 m width on the generated plan. The public task contains the plan and measurements. The source image and project details stay out of the gallery.
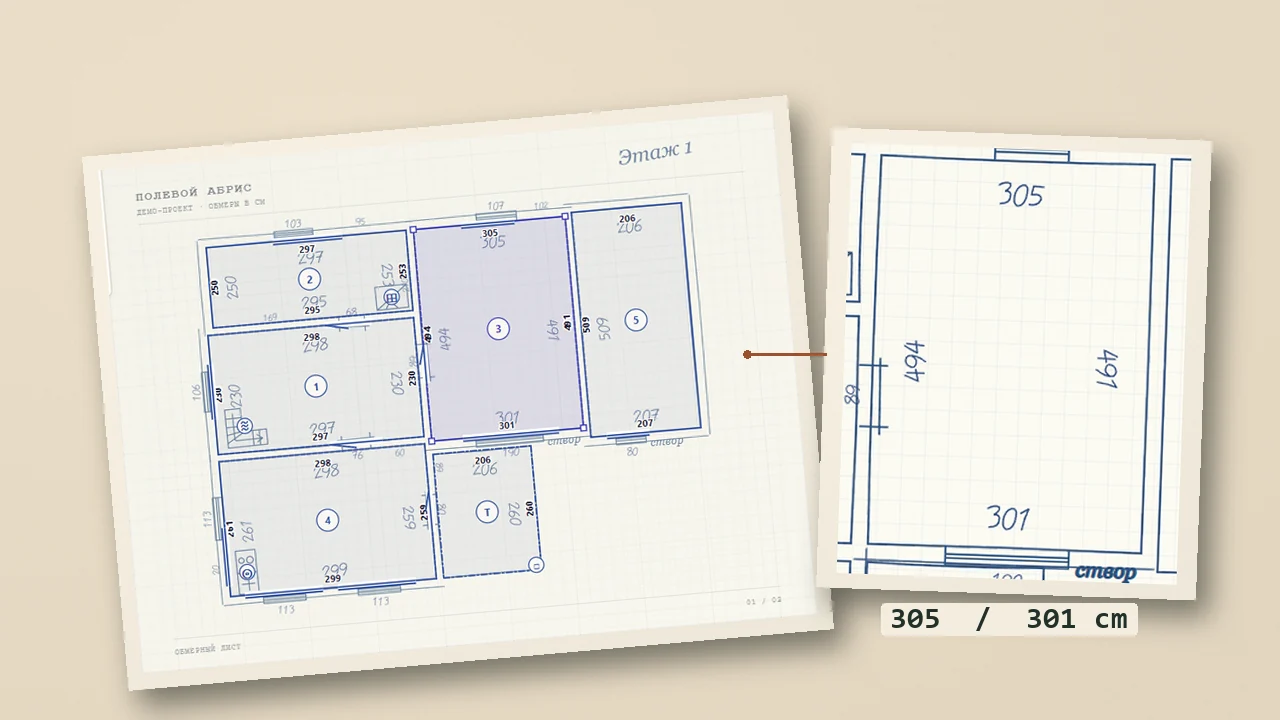
Watch the walkthrough
Turn a measured field sketch into a floor planQuestions and answers
What if two opposite wall measurements disagree?
Check the recorded endpoints and units, then inspect a measured diagonal or other independent control. Confirm which dimensions define the room and whether the walls are parallel.
Does a recognised number need to be checked?
Yes. Confirm both the digits and the segment they measure. Also check each opening offset and any values that control the outline.
Sources
Related guides
- How to photograph a field sketch for a floor planCapture a legible measured sketch, organise multi-page PDFs by floor and check the digital plan against your site measurements.
- Export a measured floor plan to DXF, DWG, PDF or JPEGChoose the right file for CAD editing, review or printing. Check millimetres in model space and verify the A4 sheet at the selected scale.